Those of you who are running some sort of a content management system (CMS) for your websites would be familiar with the problem of improving the site loading speed through different methods. From the age old caching methods of using op cache module, to using an application specific caching method such as WP-Supercache for your WordPress installations, the sheer variety of solutions out there is a lot.
For a non-tech webmaster (these days, this term seems like a conundrum!), it becomes difficult to choose. At the end of the day, what one ends up going for is how fast the website is loading and more importantly how is the web performance of the site.
Let’s take a look at what are some of the common factors that any webmaster would like at for their caching solution.
Server site rendering time
This is effectively how fast is your server giving the response on the browser. Let’s say that you are running a blog on a small instance or a shared hosting solution. This would usually have limited resources associated with it, be it computing or memory. For instance, currently, these pages are being served off a 512 MB droplet.
Needless to say as your traffic increases, these limited resources are then not enough to address the entire traffic and thus, the response time for all your visitors starts to increase. A simple solution for these problems could be to bump up the hardware and increase the computing and memory being made available for the server. The computing speed is obvious, but why the memory you might ask? Well, since most web servers are softwares running on servers (for e.g Apache or Nginx are the servers most commonly used for WordPress), these software processes have to run on the server. The more the traffic, the more the number of processes.
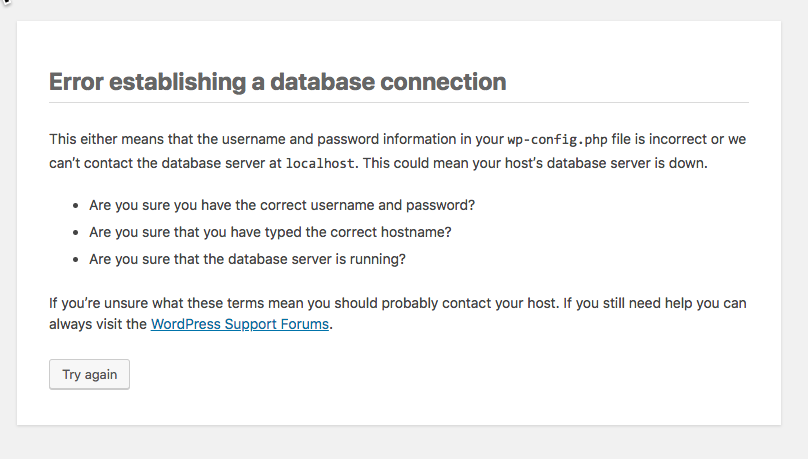
If you are running WordPress and are facing a load of traffic, and if you are running your database on the same server, then you might sometimes be seeing images like the one below –

Seems familiar? A common reason for this is when there are too many apache2 processes and not enough memory to handle all of them. The server promptly terminates the other processes, including the MySQL daemon.
Caching to the rescue
This is where server side caching comes to the rescue. Take this blog post for instance. How many times in the week am I going to edit this? Not many right?
In which case, instead of the PHP script executing every time, why can I not serve the static (HTML pre-rendered) version of this post?
WP-Supercache does a good job as a plugin to do this, however, in this case, for supercache to execute, the WordPress PHP scripts are still executing. How can we stop those?
Another option would be to run caching at Apache or Nginx’s level. This is a much better approach since instead of calling PHP scripts, the server will serve the last known cached static file. The problem with this approach is cache management and storage.
With a small server, you may not have a lot of storage, and if you have been maintaining a content heavy site, then caching all pages might be a storage intensive process. The expectation from your instance’s compute power also increases.
This is where you will find reverse proxy servers shining.
Reverse proxy servers
A reverse proxy server is a server that sits in front of the web servers and forwards client requests. One of the older versions for PHP based websites was Varnish. Nginx also offers this, and newer versions of Apache also do offer this functionality.
What the reverse proxy does is for each request, it caches the response from the down stream server and serves that response for each subsequent request. Think of it as a smart cache manager that sites seamlessly between your CMS and the user.
Traditionally, these were a bit difficult to setup, and therefore were the domain of only the tech oriented webmasters. However, of late, there have been a couple of smart SasS based reverse proxies, and that’s what I wanted to write about.
Cloud-based reverse proxies
A cloud based reverse proxy is a reverse proxy server that’s not on your network/server infrastructure, but rather hosted as a separate service that you choose to buy.
I had initially tried Cloudflare, but wasn’t really impressed with the results. There were a couple of Indian service providers as well, but the outcome wasn’t that great.
Then, one of my colleagues pointed me to Nitropack. Getting started with Nitropack was a breeze and I could easily set this up. There was also a plugin to be installed in my WordPress setup and that’s about it. Nitropack even had a CloudFlare integration (since I manage my DNS on CloudFlare), where it made the relevent DNS entries and I was able to use this without too much of a hassle.
I am currently on the free plan, but the immediate impact on my server response times, and my web performance has been substantial.
If you are a website owner and if you have been harangued with web performance issues, do give this solution a try. It makes a sufficient impact on your response times.